Overview
The Tickets section allows event organizers to configure how attendees register for an event. You can create one or more ticket types, define ticket capacity, control ticket visibility, and manage ticket settings before the event begins. For paid events, you can connect a Stripe account to accept online payments.
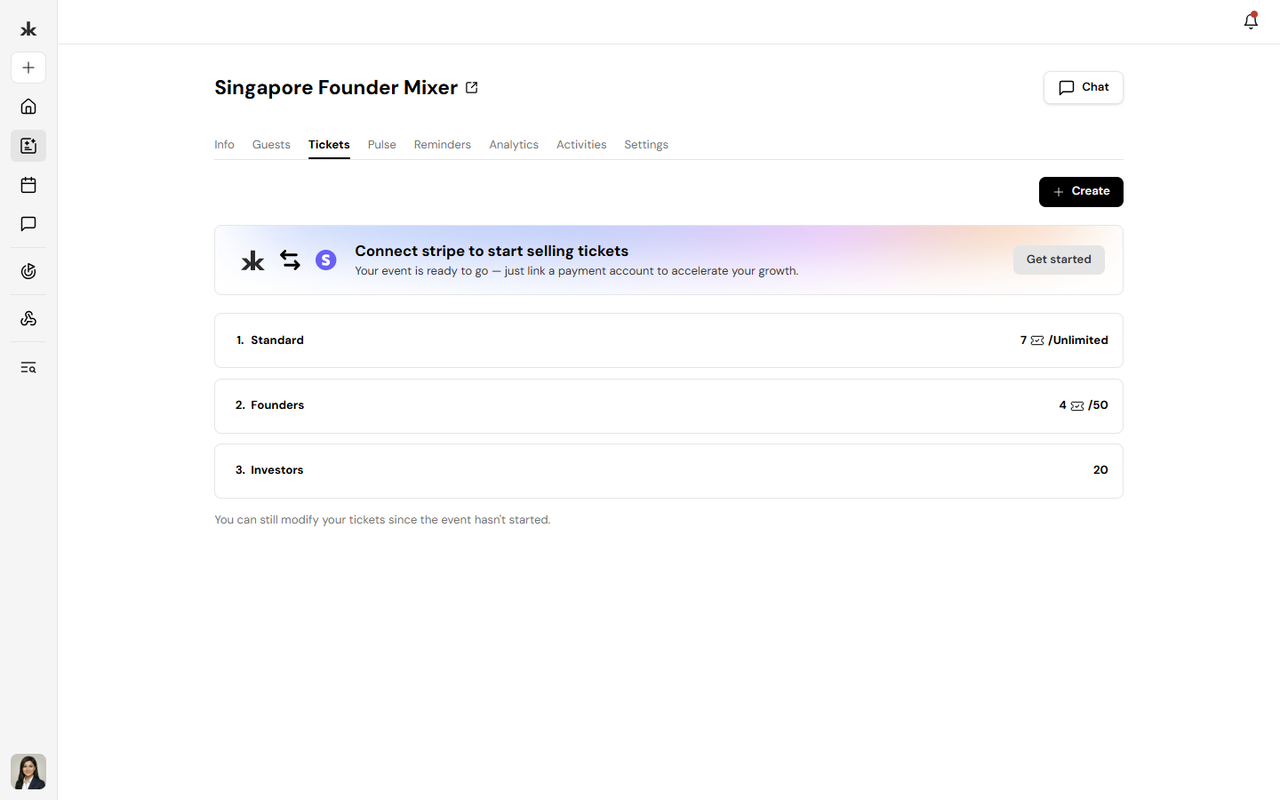
Access the Tickets Section
To manage tickets for an event:
- Open the event you want to manage.
- Navigate to the Tickets tab.
- Create a new ticket or edit an existing ticket.
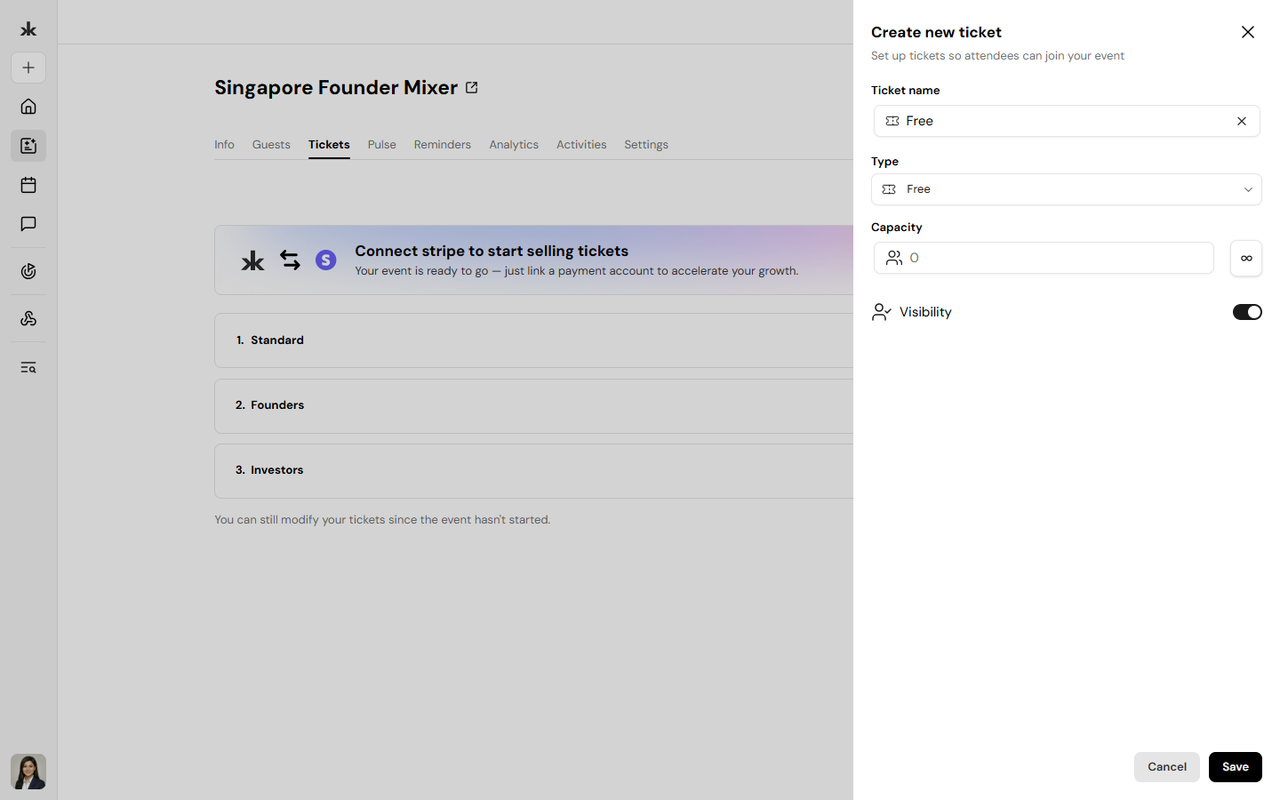
Create or Edit a Ticket
When creating or editing a ticket, configure the following information.
Ticket Name
Provide a descriptive name for the ticket, such as:
- Standard
- VIP
- Early Bird
- Student
The ticket name is displayed to attendees during registration.
Ticket Type
Select the ticket type for your event.
Depending on your event, you can configure:
- Free tickets for events that do not require payment.
- Paid tickets after connecting a Stripe account.
Ticket Capacity
Define how many attendees can register using the ticket.
You can:
- Set a specific attendee limit.
- Select Unlimited to allow unlimited registrations.
Once the ticket reaches its capacity, attendees can no longer register using that ticket unless the capacity is increased.
Ticket Visibility
Control whether the ticket is available during registration.
- Visible - Attendees can view and register using the ticket.
- Hidden - The ticket is not displayed during registration until visibility is enabled.
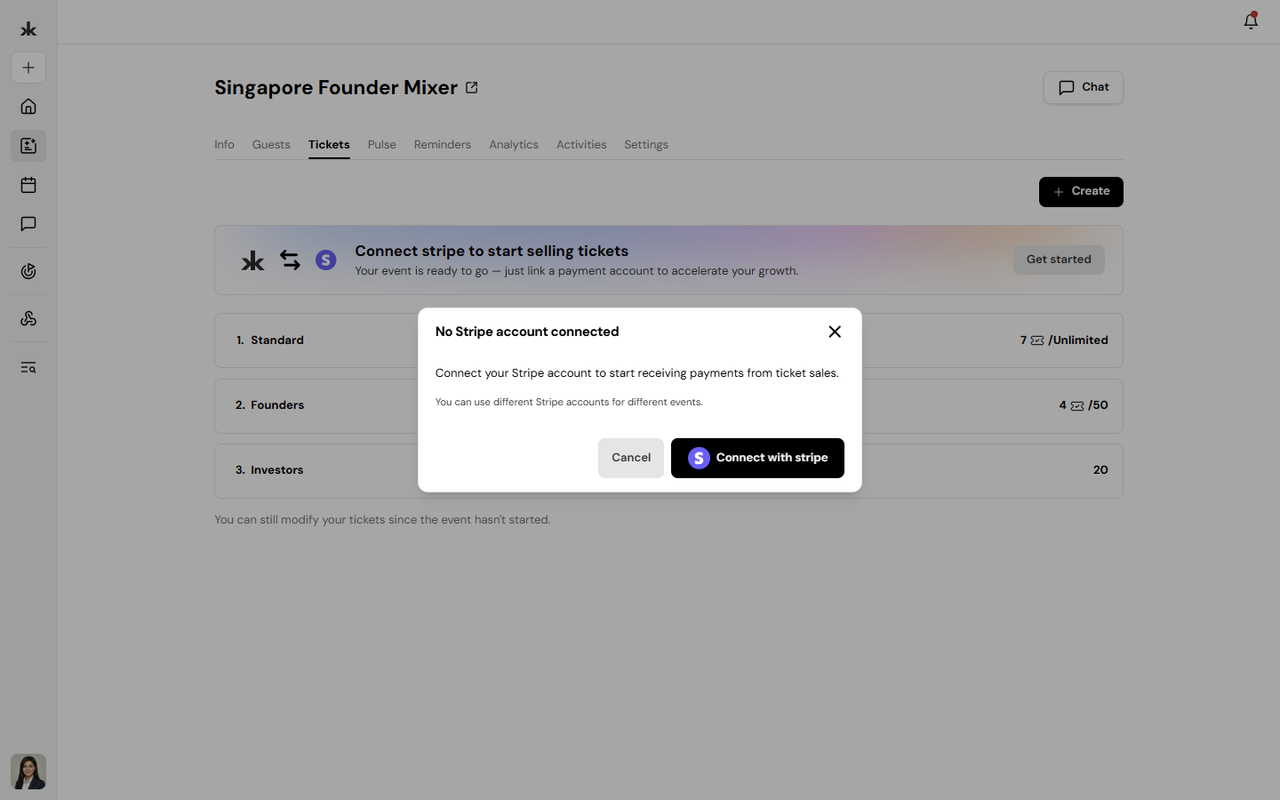
Connect Stripe for Paid Tickets
To sell paid tickets, connect your Stripe account from the Tickets page. Once connected, you can configure paid ticket types and accept payments securely through Stripe.
Save Ticket Changes
After configuring the ticket:
- Review the ticket details.
- Click Save.
If the event has not started, you can continue updating ticket settings as needed.
Edit Ticket Restrictions
Tickets can be edited before the event begins. However, once attendees have purchased tickets, certain fields become restricted.
You can continue to:
- Edit the ticket name.
- Update ticket visibility.
- Increase the ticket capacity.
The following restrictions apply after tickets have been purchased:
- The ticket price cannot be changed.
- The ticket capacity cannot be reduced below the number of tickets already sold.
- The ticket capacity can be increased at any time to accommodate additional attendees.
These restrictions help protect existing registrations and ensure a consistent experience for attendees.
Best Practices
- Use clear and descriptive ticket names.
- Set an appropriate capacity based on your event size.
- Use Unlimited only when there is no attendance limit.
- Hide tickets that should not yet be available for registration.
- Connect Stripe before creating paid tickets.
- Review ticket settings before publishing your event.
Frequently Asked Questions
Can I create multiple ticket types?
Yes. You can create multiple ticket types for a single event.
Can I limit the number of registrations?
Yes. You can define a maximum capacity or select Unlimited.
Can I edit a ticket after attendees have purchased it?
Yes, but some restrictions apply. Once tickets have been purchased:
- The ticket price cannot be changed.
- The ticket capacity cannot be reduced below the number of tickets already sold.
- The ticket capacity can be increased.
- Other editable fields, such as the ticket name and visibility, can still be updated.
Can I sell paid tickets?
Yes. Paid tickets can be configured after connecting a Stripe account.
Can I hide a ticket without deleting it?
Yes. You can hide a ticket by disabling its visibility. Hidden tickets are not shown to attendees during registration.