Overview
Creating a community in Key AI is powered by Kai, your AI community builder. Instead of manually configuring your community from scratch, Kai guides you through a conversational experience to understand your vision and automatically generates your community website, branding, onboarding questions, channels, and initial setup. Throughout the process, you'll be able to review, edit, and customize the generated content before publishing your community.
Create a Community with Kai
To create a new community:
- Navigate to the Communities tab on the navigation bar.
- Click Create Community.
- Kai will launch and begin the guided community creation experience.
- Follow the prompts to tell Kai about your community.
- Review and customize the generated content.
- Publish your community when you're ready.
Step 1: Tell Kai About Your Community
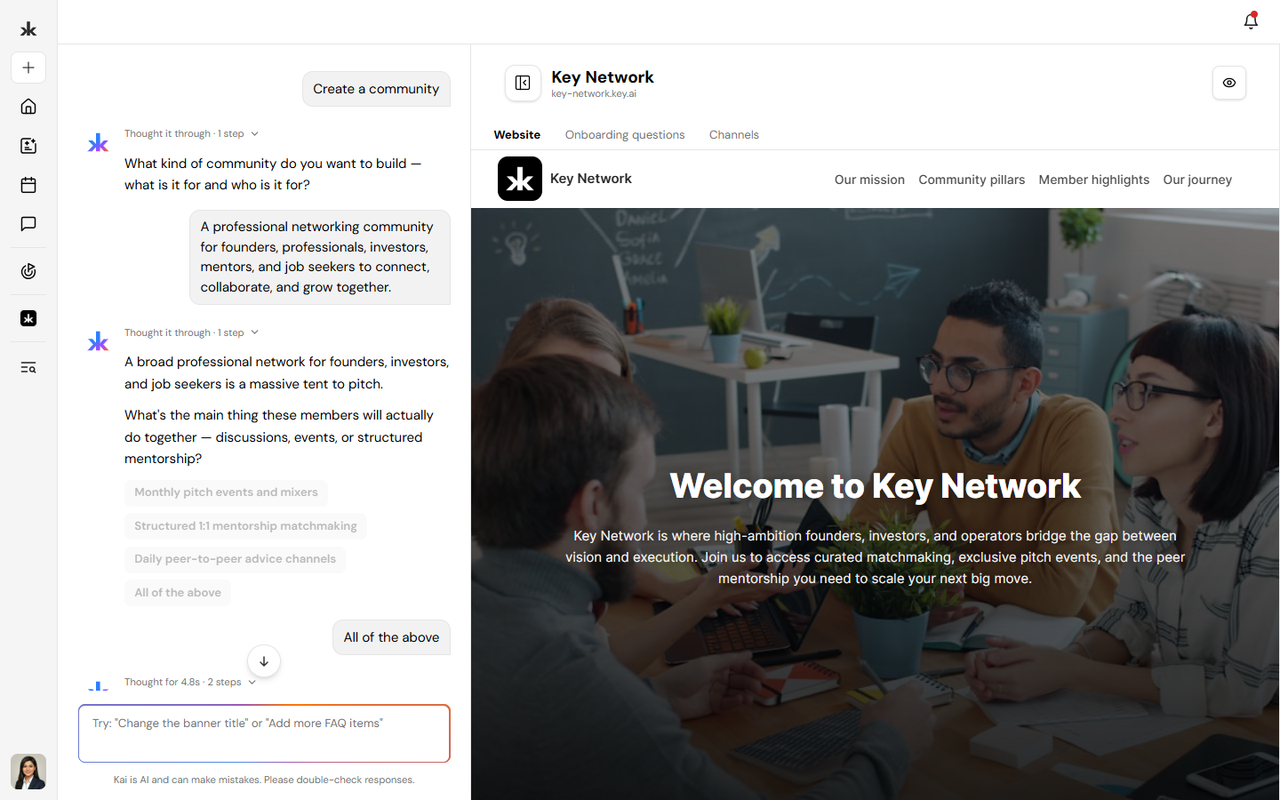
Kai begins by asking a series of questions to understand your community, including:
- The purpose of your community.
- Who the community is for.
- The activities members will participate in.
- The overall tone and vision of the community.
You can answer by:
- Typing your own responses.
- Selecting suggested responses.
- Choosing All of the above when multiple suggestions apply.
- Skipping the remaining questions after answering at least one question and allowing Kai to begin generating your community.
Step 2: Review the Community Summary
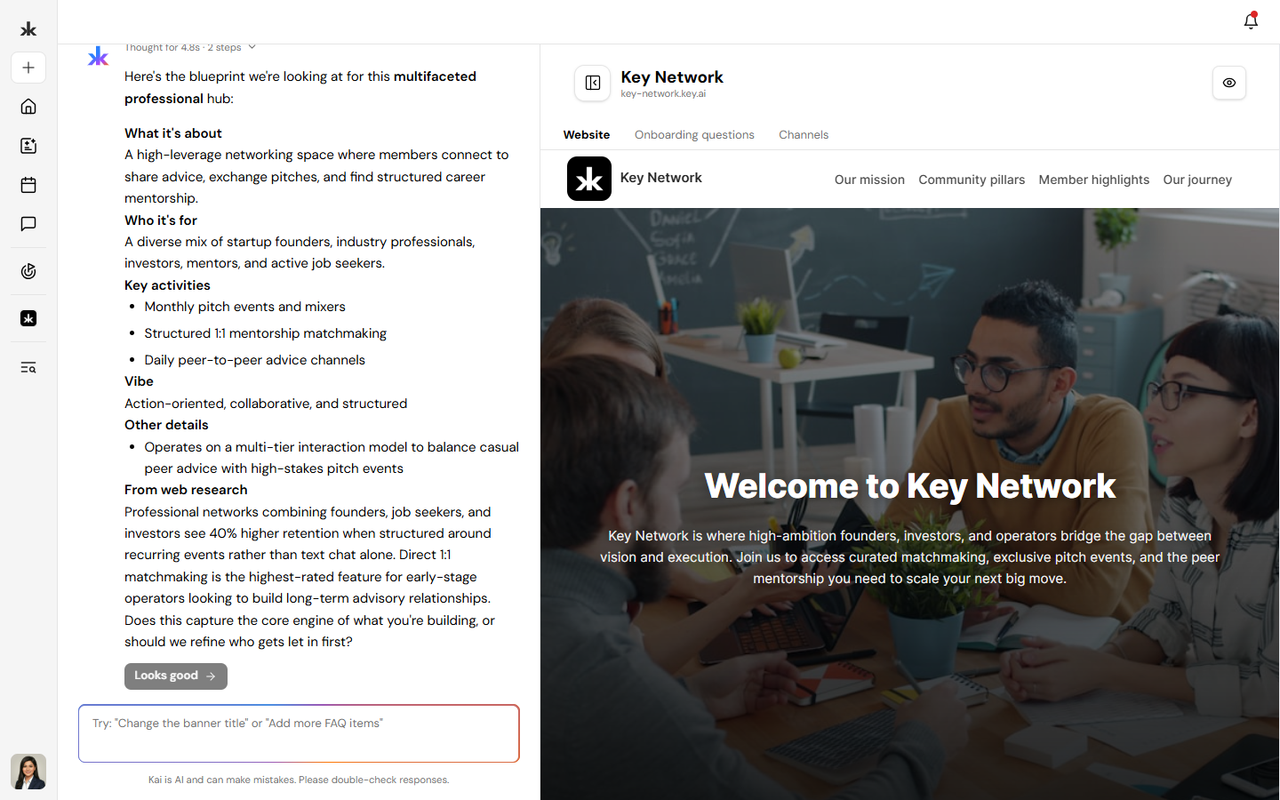
Once the interview is complete, Kai presents a summary of your community based on your responses. Review the summary carefully to ensure it accurately represents your vision. If you'd like to make changes, simply reply in the chat and Kai will update the summary before continuing.
Step 3: Choose Your Community Name and URL
Next, Kai helps you:
- Select a community name.
- Confirm your community URL (subdomain).
Once confirmed, Key AI reserves your community URL and creates a draft version of your community.
Step 4: Customize Your Community
Kai allows you to personalize your community by selecting a website style and configuring your branding.
You can:
- Choose a website layout.
- Upload your own logo.
- Generate a logo using AI.
- Regenerate AI-generated logos until you're happy with the result.
- Allow Kai to automatically generate a color palette based on your selected logo.
All branding can be updated later from your community settings.
Step 5: Review Your Community Plan
Kai generates a draft community plan based on your responses. The plan serves as the foundation for your community and typically includes:
- Community purpose.
- Target audience.
- Website content.
- Onboarding experience.
- Categories and channels.
Review the plan and make any edits before continuing.
Step 6: Review AI-Generated Content
Kai automatically generates several parts of your community, including:
- Community website.
- Onboarding questions.
- Categories and channels.
As each component is generated, you can preview it, edit it, or regenerate it before publishing.
Step 7: Configure Community Settings
Before publishing, Kai walks you through a few final settings, including:
- Whether to keep the AI-generated onboarding questions.
- Whether to keep the AI-generated channels.
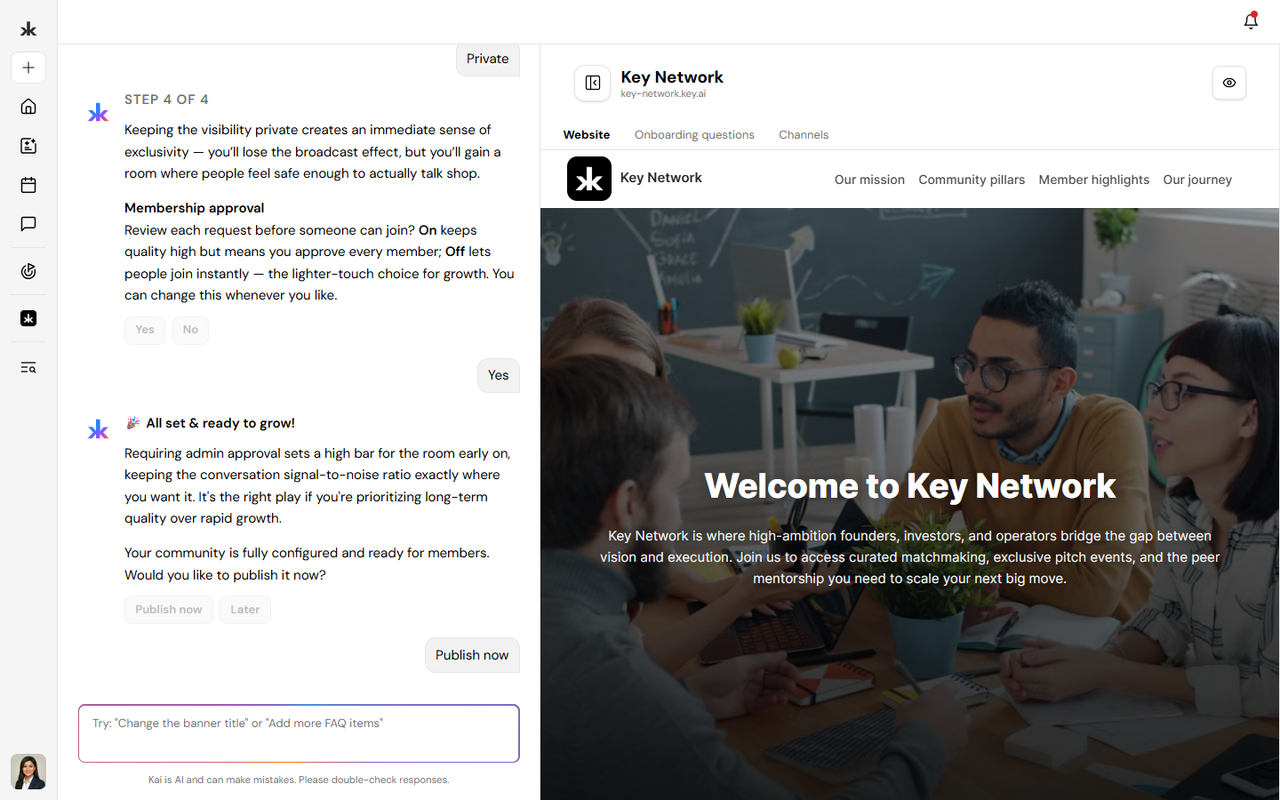
- Whether your community should be Public or Private.
- Whether membership approval is required.
These settings can be changed later from your Community Settings.
Step 8: Publish Your Community
When you're satisfied with your community, click Publish.
Key AI will:
- Publish your community website.
- Apply your branding.
- Save your onboarding questions.
- Create your channels and categories.
- Make your community available for members to join.
If you prefer, you can save your community as a draft and return to publish it later.
Continue Improving Your Community with Kai
After your community has been published, you can continue working with Kai to improve your community.
Using Ask Kai, you can:
- Update website content.
- Rewrite descriptions.
- Generate new sections.
- Update branding.
- Generate or replace logos.
- Refine your community using natural language.
Best Practices
- Provide detailed answers during the interview to help Kai generate more accurate content.
- Review the community summary before continuing.
- Customize your branding to reflect your community identity.
- Review the AI-generated onboarding questions and channels before publishing.
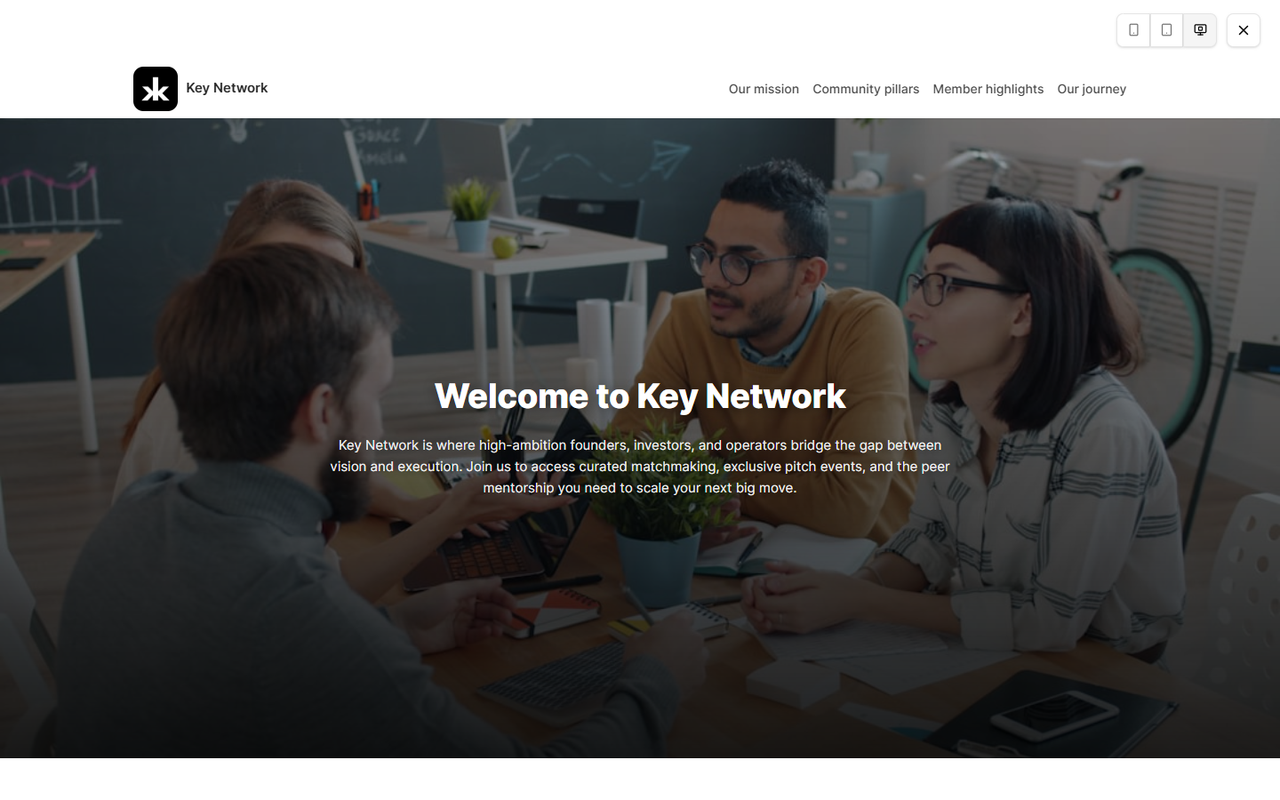
- Preview your website before making your community live.
Frequently Asked Questions
Can I skip the interview?
Yes. After answering at least one question, you can skip the remaining questions and allow Kai to generate your community using the information you've already provided.
Can I edit the AI-generated content?
Yes. You can review, edit, or regenerate your website, onboarding questions, channels, and branding before publishing.
Can I save my progress and continue later?
Yes. Your progress is automatically saved, allowing you to return and continue creating your community at any time.
Can I continue using Kai after my community is published?
Yes. You can use Ask Kai to update your website content, branding, and other community elements even after your community is live.